Sunday 1 November 2015

Cheers, 2016! November Stamp of the Month Australasian Blog Hop

Hi! It's time for our November Stamp of the Month Australasian Blog Hop!!!! So Excited to share my project with you!
But firstly... If you arrived here from Wendy Hopper's Expressions of the Heart, then you are in the right place! If you have come across my post from somewhere else, thats OK! Join in! It's fun! Just follow the link at the bottom of my post to click through to the next blog and keep going til you get back here!

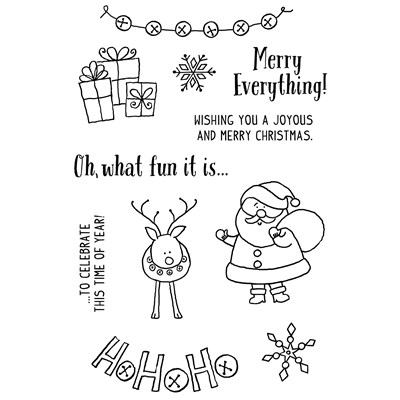
This month we are celebrating this set:

So this set would be so great for New Year scrapbook pages or even a new year card but to me it just screamed New Year Resolutions.... so I made this:


The whole book is 8 pages (including the cover) and is made from just 1 sheet of White Daisy Cardstock cut into 4 inch strips, folded in half (use the scoreboard for best results) and then tied together using Poppy Twine.
The only stamp set I used other than Cheers, 2016! is Jennifer's Hand which is an awesome alphabet set that I LOVE - it's small enough to use on cards and only costs $15 for a set of 45! I used it to write the word 'Resolutions'.
I used the Sangria Paper Pack, the eggplant and pomegranate cardstock from that pack, eggplant, pomegranate, slate and Pacifica inks, the confetti stars embossing folder, the sanding kit, gold shimmer trim and a star from the gold fundamentals assortment.


The star panel on the front cover was created by running pomegranate cardstock through the big shot using the confetti stars embossing folder then sanding it to make the stars stand out. I cut a length of  shimmer trim into quarters and then used three of those pieces to create the tail on my shooting star.

I hope you enjoyed my project. To get your own copy of the Cheers, 2016! stamp set, contact your CTMH consultant to place an order before the 30th of November, after that they will be gone.

I'd love you to leave a comment before hopping off to see what Shaunna has created on her blog:  Passionate About Pages.

Saturday 10 October 2015

Sangria Australasian Blog Hop

Welcome to the Australasian Blog hop for our Paper Feature - Sangria. If you have arrived from Vandra's Virtual CTMH Craftroom then you are in the right place. If you have arrived here by chance, then come and join the hop by following the link at the bottom of my post and continue hopping until you arrive back here.

Ever have one of those moments when you have to make a card quickly and you are not sure what to do? Well, I had one tonight. By the time you are reading this I will be on my way to a very exciting convention for Close to my Heart consultants in Brisbane. That meant I spent this week organising. Yesterday washing and today packing. Eeeek!!! What will I do for the blog hop!?

Luckily Sangria is just the most beautiful paper pack so the papers can do most of the talking. My son asked me to use this stamp set:
 
so I knew we were going for Christmas ... and then I thought... well what would I do if I was on the way to a party and had to quickly knock something together? Well, I'd use a complement pack of course!
 
So here we are: 15 mins of work:


Ok, so it's not the most amazing card but I think its pretty neat and it's certainly pretty good for 15 mins. Now... I'm off to my convention so you best check out Mez's Craft Room to see what she has come up with.


Thursday 1 October 2015

Twinkle - Stamp of the Month Blog Hop

Welcome to this month's blog hop! If you have arrived here from Mandy's Hall of Indulgence then you are in the right place - if you arrived here by accident then you are in luck! Just join in by clicking the link at the bottom of my post to follow the hop from project to project until you arrive back here!

This month we are featuring this stamp set : Twinkle.


I LOVE this set! I especially love the lights! So pretty! I can just image using this on scrapbook layouts with photos taken in night markets in Cambodia, my friend's wedding who had fairy lights strung through trees, New Year's Eve photos and of course Christmas light photos! Oh they are so pretty!

Alright, so here is how to stamp the lights to make a pretty background:


You just use the string and the stamp with the outline of the lightbulb in black then take the solid lightbulb stamp and stamp in the desired colours.


Ok, so that IS pretty and I love it.... but.... I've been dying to try this:

So you rub the confetti stars embossing folder with an ink pad in the colour of your choice. I've used sapphire. Make sure you coat the side that has the stars sunken in.

Then place your card into the embossing folder with the stamped design placed on top of the inked side of the folder. I also made sure that embossing folder had most of the stars at the top of my card.

I run it through the big shot and when I pull it out it looks like this!

Yay! Pretty lights and stars in the night sky.

Add a finishing touch and we are done!
The stamp set I have used for the word 'bright' is Jennifer's Hand. It's a great alphabet font for cards as the size is nice and small. I coloured behind it with a Shinhan marker.


If you love this stamp set as much as I do you can buy it this month from your Close to my Heart consultant, it is $27 or just $7.50 with a qualifying order. Hurry, once the month is over this set will no longer be available!

To see what other wonderful creations can be made from this set, continue on to Patricia Manhire's Creative Corner
Don't forget to leave a comment before you go!


Thursday 10 September 2015

Australasian Nevermore Blog Hop

Welcome to our Australasian Nevermore Blog Hop. If you've come here from Expressions of the Heart then you are in the right place! If you've happened upon us by happy mistake then please join in by hopping from blog to blog by clicking the links at the end of each blog post until you arrive back here.


(Just a warning and an apology - my photos appear to be very washed out in this post - not sure what has happened - I will try to replace them when I can get some better ones).

So the Nevermore papers are designed to be Halloween themed HOWEVER I just can't get past these sheets of industrial style planning papers. Sometimes you just see a paper that needs to be celebrated on a page layout and this is one of them.


So as not to loose what I love about the paper in my page design I kept it very simple with black and slate cardstock and just a few select embellishments.


My page is designed to be about my Dad. I never do pages about him so this is really nice. He is currently building a model railway in his shed and I am going to use these pages to showcase some of the work in progress. So I cut my title and the cogs out on my cricut. The cogs come from the Artiste cartridge.


Then I needed to distress the edges of my title. Those inside bits are too fiddly for a sponge or a dauber so I used a cotton bud. It had the added bonus of creating flyaway threads which dragged some extra ink across my lettering giving it a real rustic feel. I then daubered on a bit of chocolate ink to give it a bit of a rust effect.


My cogs got daubered with the chocolate ink and I used another cotton bud to do the smaller inside bits. I used the black cotton bud again just to add a few grease marks here and there. I also daubered the edges of one of my slate boxes - I intend to use this one for journaling.


So let's talk embellishments. Each paper pack has a pack of matching embellishments called complements. Here is a photo of the Nevermore ones. The first photo is the two sticker sheets included in the complements pack and the second photo is the kraft die-cut shapes and thick clear plastic die cuts.


Not heaps I can use on my layout here but there are a lot that could be used on non-Halloween layouts, like the stars, bunting, arrows, file tabs, frames and chandeliers. I choose an arrow and the file tab.

Now one thing that strikes me with Nevermore is that the colours are very similar to our Urban paper pack. So let's take a look at the urban stickers included in the complement pack :


Perfect. Train luggage tags, another yellow arrow, a circle with plans on it and one with metal imprints. Done. Now when I put down the photos these embellishments will pick up the yellows and blues I know Dad has used on the portions he has done so far on the railway.


Thanks for checking out my project, feel free to leave a comment before hopping off to see what has been created in Mez's Craft Room.

 If you would like to create your own Nevermore project feel free to click through to your consultants shop to find any of the materials used throughout the blog hop. The Nevermore paper pack is only $15 and includes 6 sheets of B&T papers (patterned papers) and 6 sheets of coordinating cardstock.

Wednesday 19 August 2015

Zoe Blog Hop


Welcome to our Australasian Zoe Blog Hop. If you've come here from Vandra's Virtual Craftroom
then you are in the right place! If you've happened upon us by happy mistake then please join in by hopping from blog to blog by clicking the links at the end of each blog post until you arrive back here.

So Zoe is my paper theme for the month and I have made two of the most beautiful double scrapbook page layouts using the paper pack and complements. I will be sharing my directions for these pages in a free file to be posted after my sisters wedding which is at the end of this month.


My title uses the Zoe Workshop on the Go stamp set and a tissue technique to get the glow around the words. The stripey bar and the arrow are both from the complements pack.
I created some pretty detail boxes by cutting the complement stickers and pairing with B&T. While we are at it though... check out that ZIP STRIP! How cool! I intend on using the triangle stamp in the Workshop on the Go stamp set to stamp a small triangle above the strip to show the month the photos were taken and one below to show the date.
  
How neat do these tabs look? All created with the Zoe Workshop on the Go stamp set.
How about a few more of those complements stickers for detail? I purposely stuck the stickers on the white dots of the paper. 
 
The Zoe complement pack has velum pieces which I have used across the top of my page.


It's an awesome zip strip again! Now while 'one happy day' is a good thing I felt like I need not just one - so I cut the letters out on the cricut to add to the title.

  
I added velum days of the week to each of my photo mats.I stamped circles with journaling lines to give me a few spots to record my thoughts.
 

Then finally I used up some of my leftover complements on these cards:
 

Thanks for joining me to see my new Zoe layouts, I hoped you liked them.
Please leave me a comment before continuing on to Crafty Connections Australia.

If you want to create any of the wonderful creations seen on the hop you can find the Zoe papers and additional supplies on your consultant's shopping page.

Saturday 1 August 2015

Framed S1508 CTMH Stamp of the Month Australasian Blog Hop

Hello and welcome aboard our Stamp of the month Australasian Close to My Heart Blog Hop. If you have arrived here from Georgia's Blog - Georgia Creates,  then you are in the right place. If you landed here by accident, no problem, please join in by following the link at the end of this post.

Well it is August and we are in uncharted territory... This month's stamp of the month isn't pictured in our current idea book... and the paper I have used isn't either.... stay tuned for a blog hop in a couple of weeks time showcasing this new paper pack which will be available for the next year as the first paper pack in the new idea book being released at the start of September. But first lets check out this set:

Those red lines around the frames show that cricut files are available for those shapes and these shapes are found on the BRAND NEW artistry cartridge which is available from today!

Ok ok ok... lets calm down and look at what I've made:
I think it's a cute way of making a background on a card and also a neat way to use the frames. The number 6 I have used is a tiny sneak peak of a new alphabet set which will be heading our way next month.

Here are my ingredients for this card:
White Daisy Card Base
Zoe paper pack
S1508 Framed August Stamp of the Month
Sweet Leaf Ink
Sorbet Ink
Glacier Ink

 Framed is only available until the end of August from your CTMH consultant for $27 or only $5 with a qualifying purchase of $75 or more.  I'd love you to leave a comment before heading off to the next stop, Designs by Marguerite.

Wednesday 1 July 2015

Life is Wonderful S1507 CTMH Stamp of the Month Australasian Blog Hop

 Hello and welcome aboard our Stamp of the month Australasian Close to My Heart Blog Hop. If you have arrived here from Georgia's Blog - Georgia Creates,  then you are in the right place. If you landed here by accident, no problem, please join in by following the link at the end of this post. 


 Today I would like to share with you this set of cards which feature July's Stamp of the Month: Life is Wonderful'  available exclusively throughout July for $27 or for just $5 when you spend $75 on CTMH products OR as part of our July campaign if you spend $32.50 on current retail priced stamps you can have this stamp set FREE!


All my card designs use the flourishes in the stamp set. I just liked the way they looked and couldn't stop creating patterns with them once I started. All my cards are 3.5 inches square on black cardstock embossed in silver.


My first card design was tricky to get accurate until I solved my accuracy problems with a bit of maths and some ingenuity.


Firstly I placed my two flourish stamps onto my versamat with the bottom of the stamps at the 1 3/4 marks. (I placed them here as that is the centre of the card).
I then placed my 2x3 1/2 inch block on top making sure the edges lined up with the 3 1/2 line and the 0 line.


 Next I placed two of my larger blocks on my versa mat making sure they were square and leaving space for a 3 1/2 inch card to fit on the mat alongside them.


Next I inked up my stamp in versa mark ink and placed my block down making sure I slid it down the sides of the other two blocks which guided it into exactly the centre of the card.


I then rotated the card 90 degrees and repeated the stamping. I rotated the card twice more so that I had 4 perfectly lined up impressions of the stamps, giving me the pattern I wanted.

You could of course use any flat straight items to line up your block but I did find that my larger blocks did the job nicely.

Once it was all stamped I of course used silver embossing powder and my heat gun to heat emboss the design.


My second card design just uses one of the flourish stamps and repeatedly stamps it around a centre point.


My third card design uses just one of the flourish stamps and tessellates it to create a background style pattern.


My fourth design uses both flourishes to mirror each other in a border style effect.


Life is Wonderful is only available until the end of July from your CTMH consultant.  I'd love you to leave a comment before heading off to the next stop,  Denise's Blog, Scrap Stamp Share .